Setup Xero Integration for a Schedule
This article explains how you can configure your Xero settings for a schedule.
Instructions
1. Go to https://portal.heroblue.com.au/
2. Select the entity from the list by clicking on it.
3. Select the schedule you wish to configure from the list by clicking on it.
4. Click the “Xero Integration” button.
Upon clicking the “Xero Integration” button your Xero chart of accounts will be obtained through the Xero API
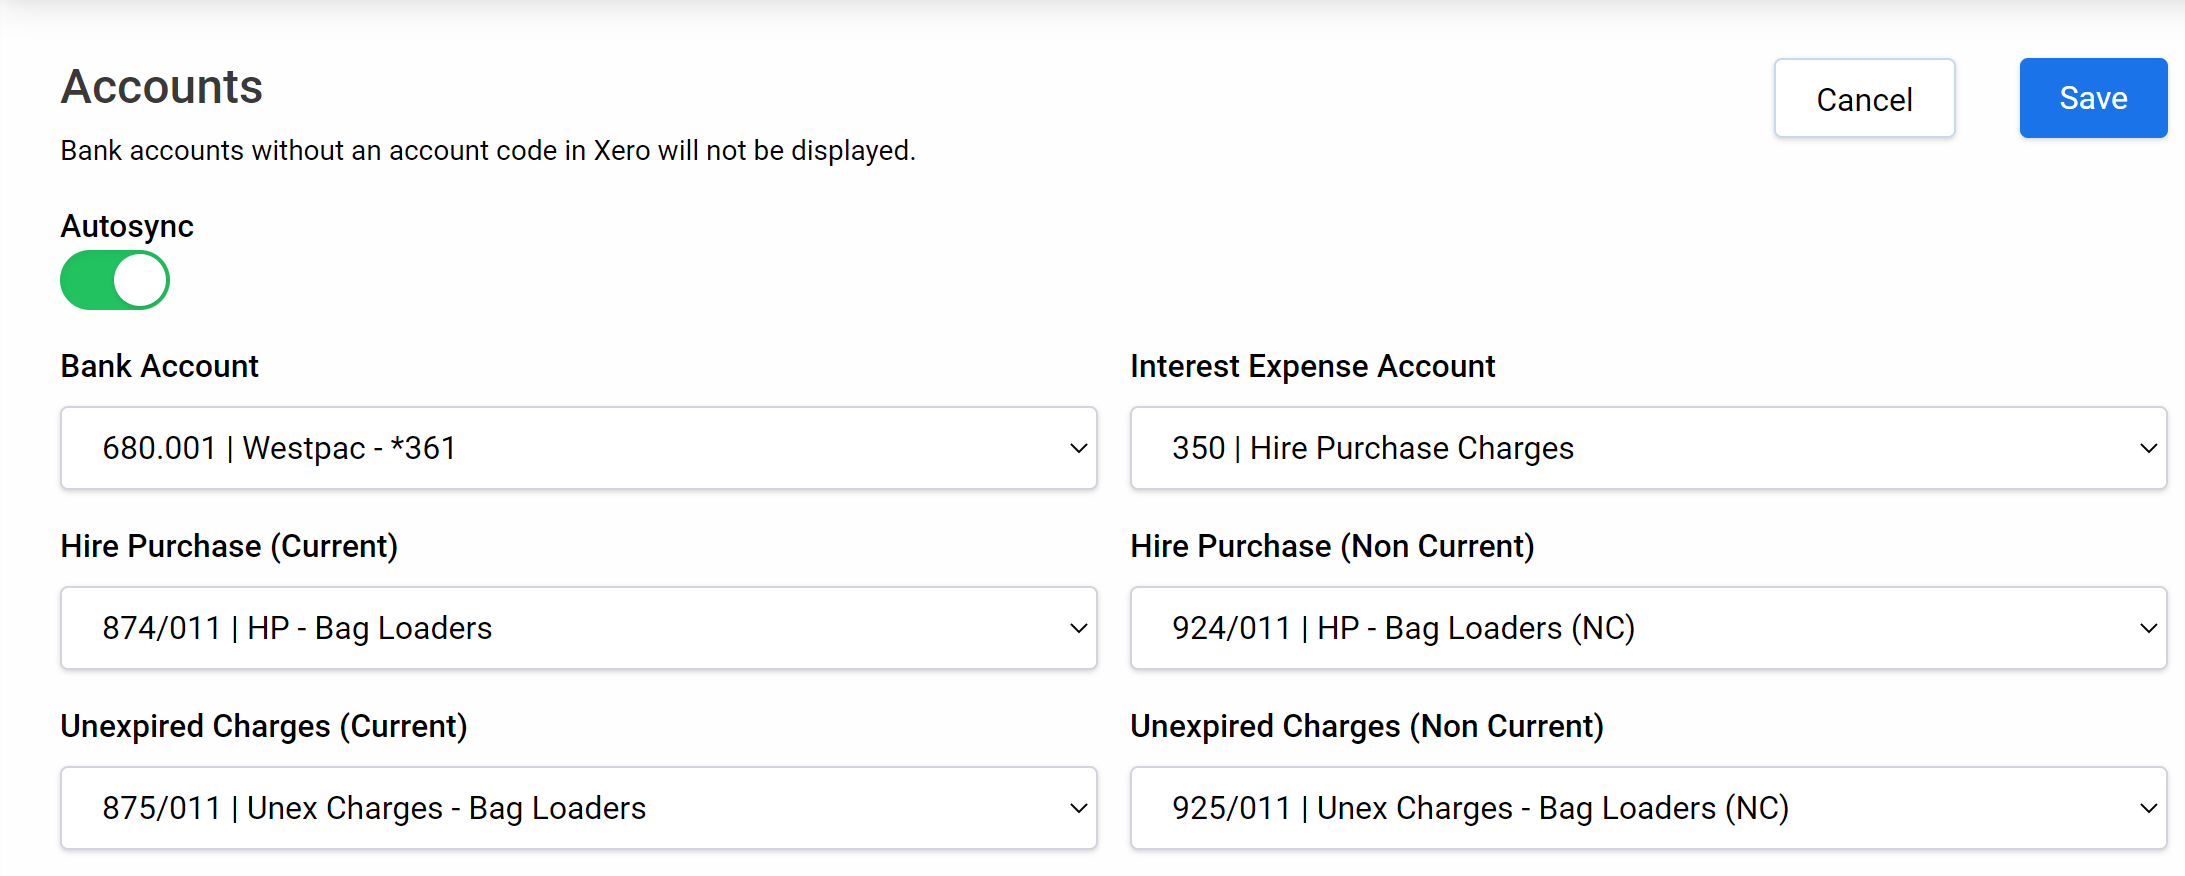
5. The accounts screen will have the following options:
You must have an account code set within Xero for bank accounts which you wish to Sync transactions to or they will not appear in the drop down.
Bank Account = The bank account from within Xero where the payment is taken out of.
Interest Expense Account = The interest portion of each payment will be allocated to this expense account.
Hire Purchase (Current) = current liability account (payments to be made in the next 12 months)
Hire Purchase (Non-Current) = non-current liability account (payments that will occur in excess of 12 months from now)
Unexpired Charges (Current) = current liability account (interest which will be incurred in the next 12 months)
Unexpired Charges (Non-Current) = non-current liability account (interest that will be incurred in excess of 12 months from now)
If you do not separate your finance schedules in Xero into current and non-current simply select the same account for the Hire Purchase (Current) & Hire Purchase (Non-Current) accounts and then the same account for the Unexpired Charges (Current) & Unexpired Charges (Non-Current) fields. See example 1 and example 2 below.
Example 1 (Where Xero is split between current and non-current)
Example 2 (Where Xero is not split between current and non-current)
.PNG?inst-v=7ac1edb1-6748-45d5-9782-bbdc57fe5a0f)
6. On this screen you can toggle the Autosync function. Toggling this on will mean that your payments automatically sync to Xero as they occur.
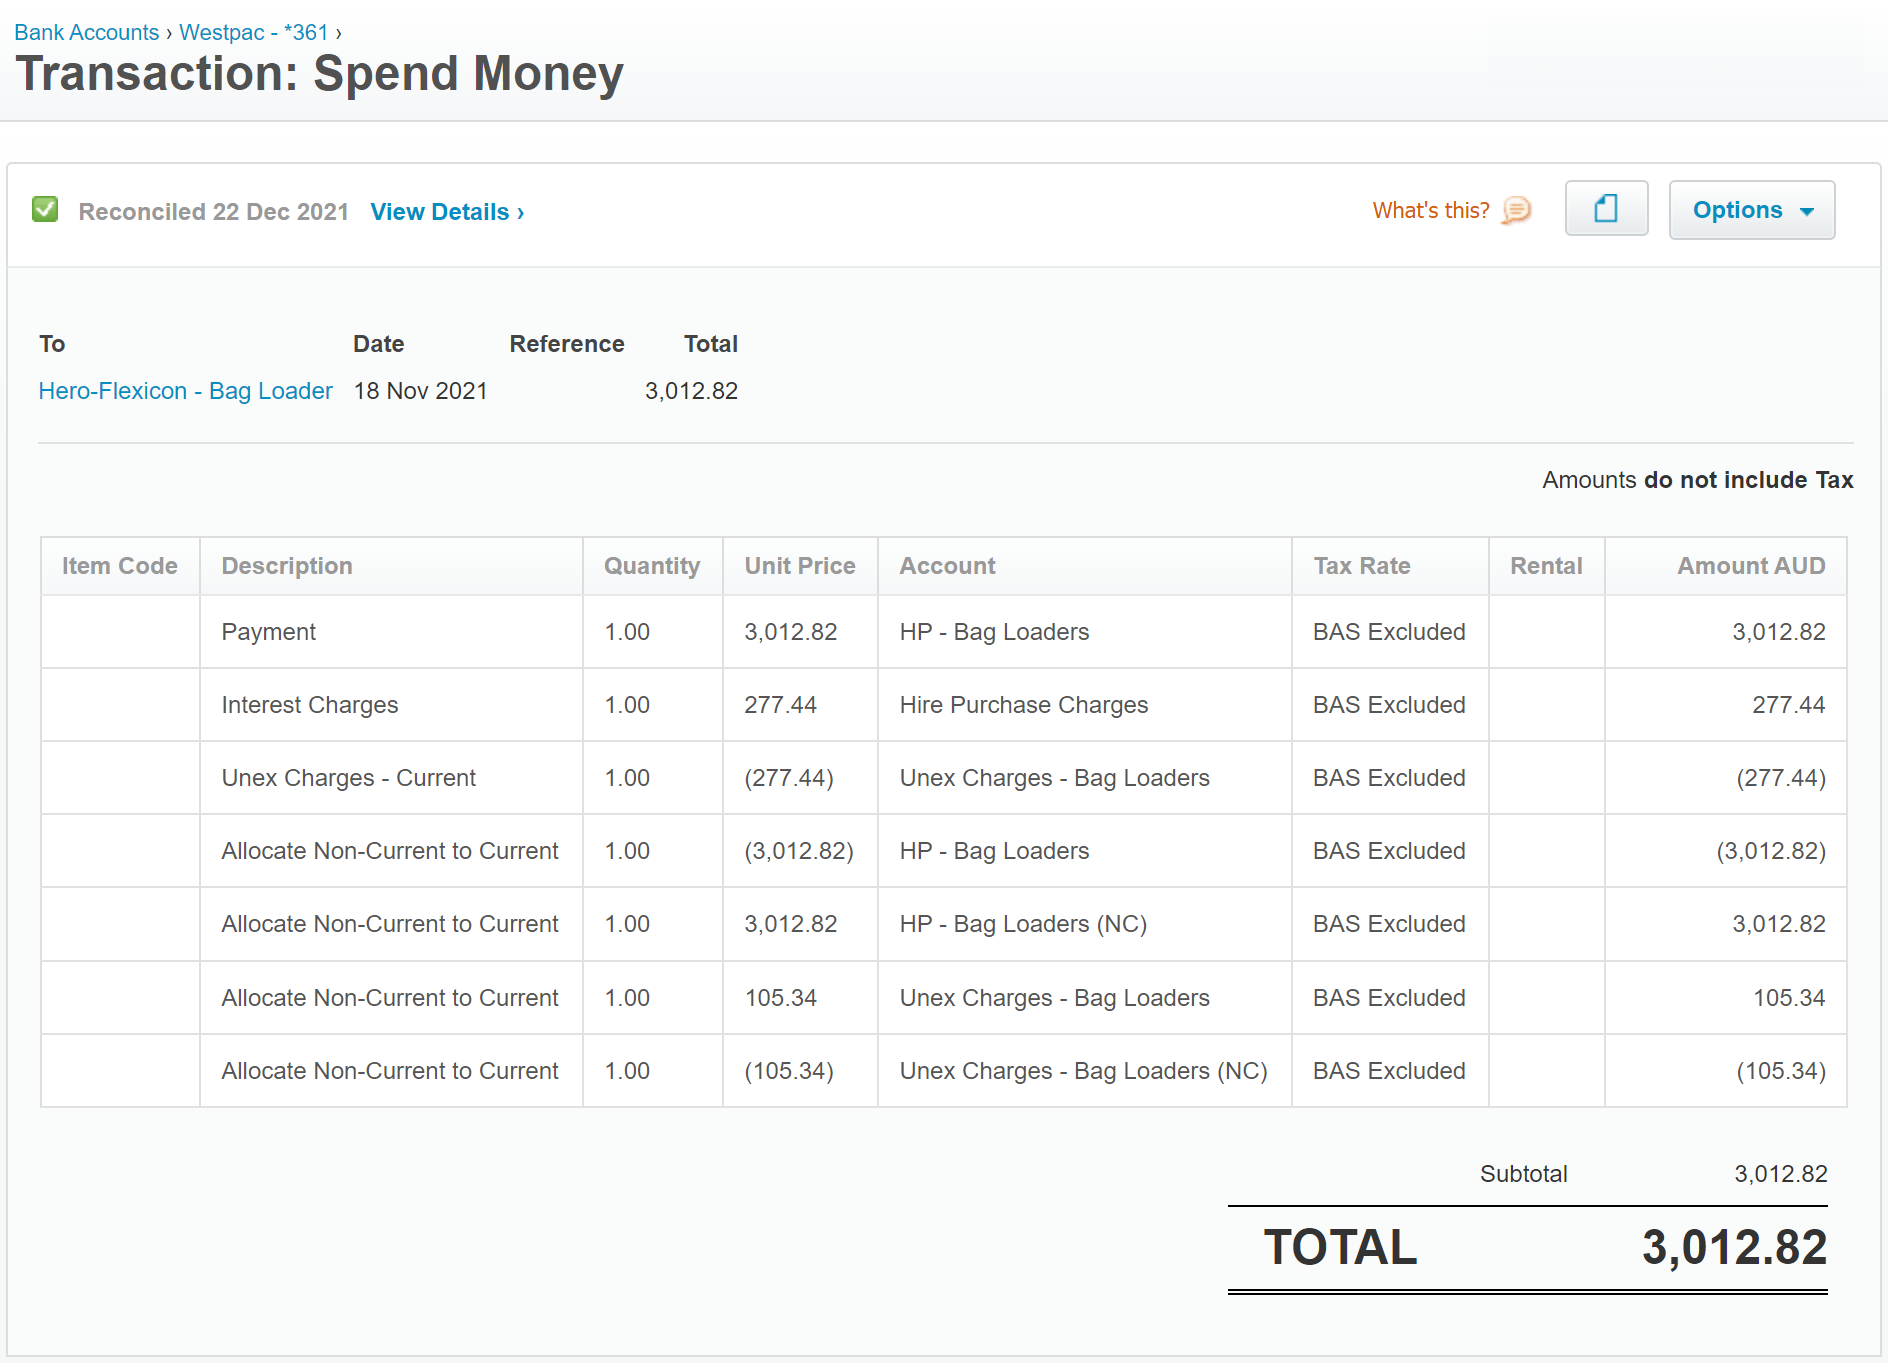
The payments sync as a Spend Money transaction in the selected bank account. The spend money transaction will allocate any applicable interest incurred on the payment to the selected expense account and re-allocate future interest and payments between the relevant current and non-current accounts in the event you do split between current and non-current in Xero. Once synced to Xero the corresponding bank transaction should come in the following day and Xero’ should automatically detect the match allowing you to simply click okay.
(see example 3 below of a spend money transaction synced by Hero Blue)
Example 3 (Example spend money transaction synced from Hero Blue)
7. Once you are happy with your settings, click the save button.
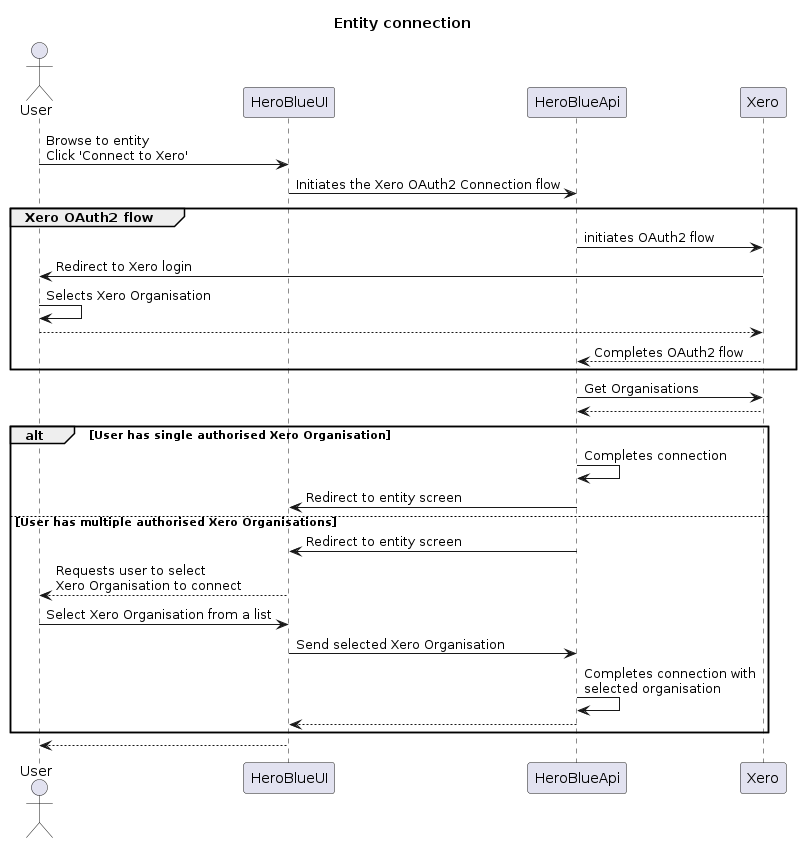
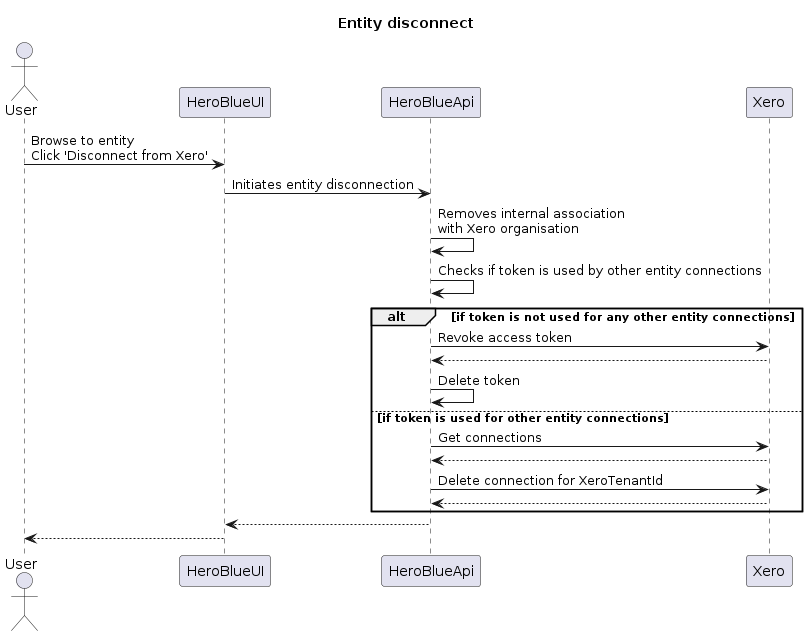
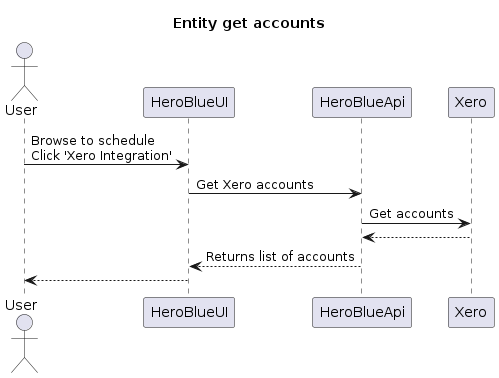
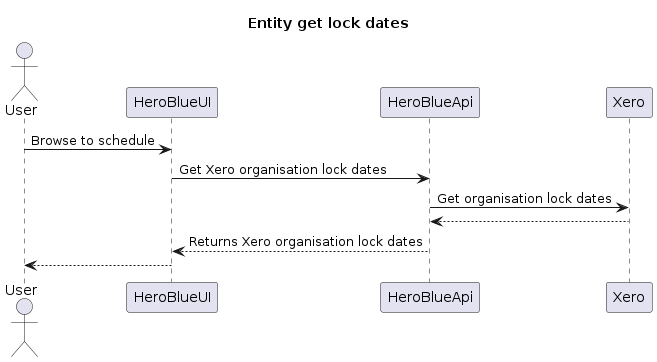
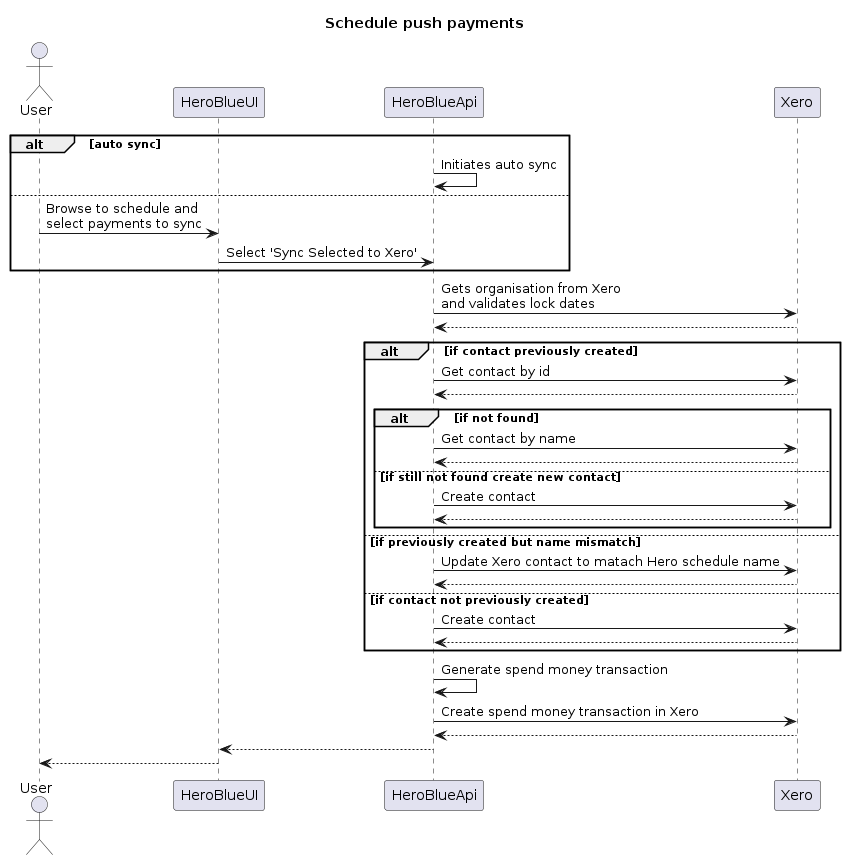
Data Flow Diagrams