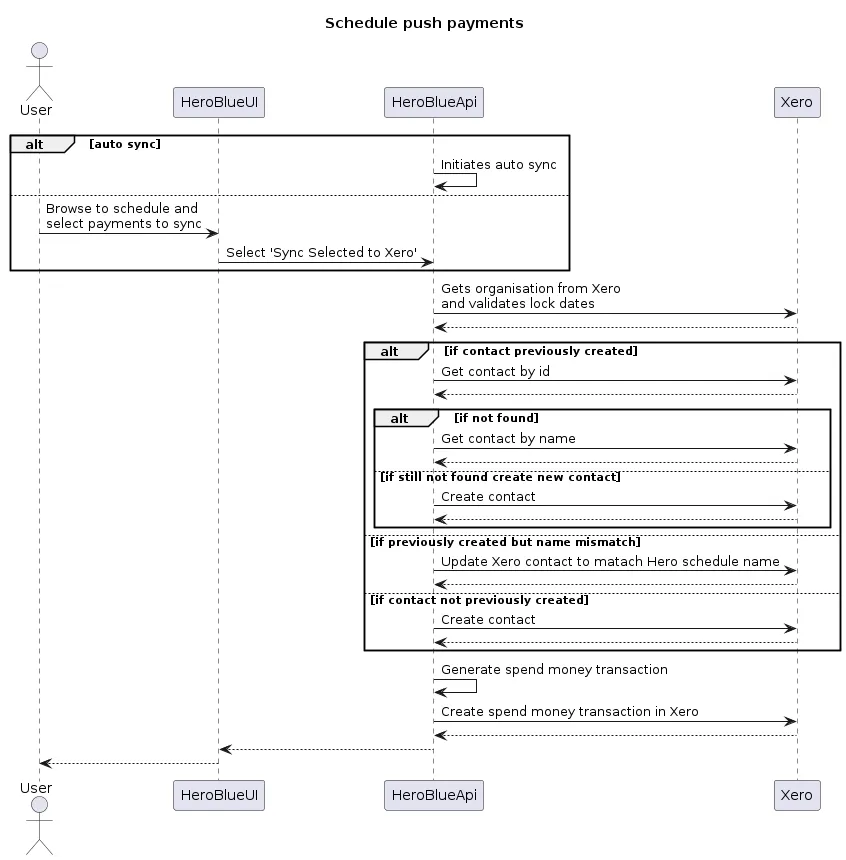
Set up Xero integration for a schedule
This article explains how you can configure your Xero settings for a schedule.
Instructions
Section titled “Instructions”-
Select the entity from the list by clicking on it.
-
Select the schedule you wish to configure from the list by clicking on it.
-
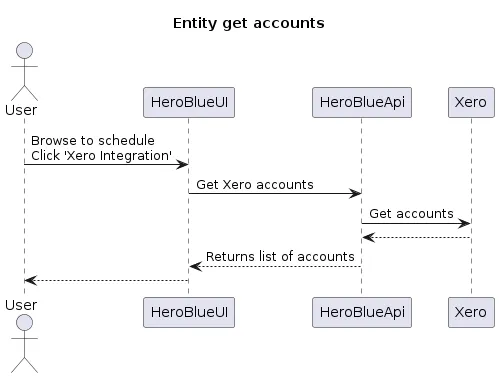
Click the “Xero Integration” button.
-
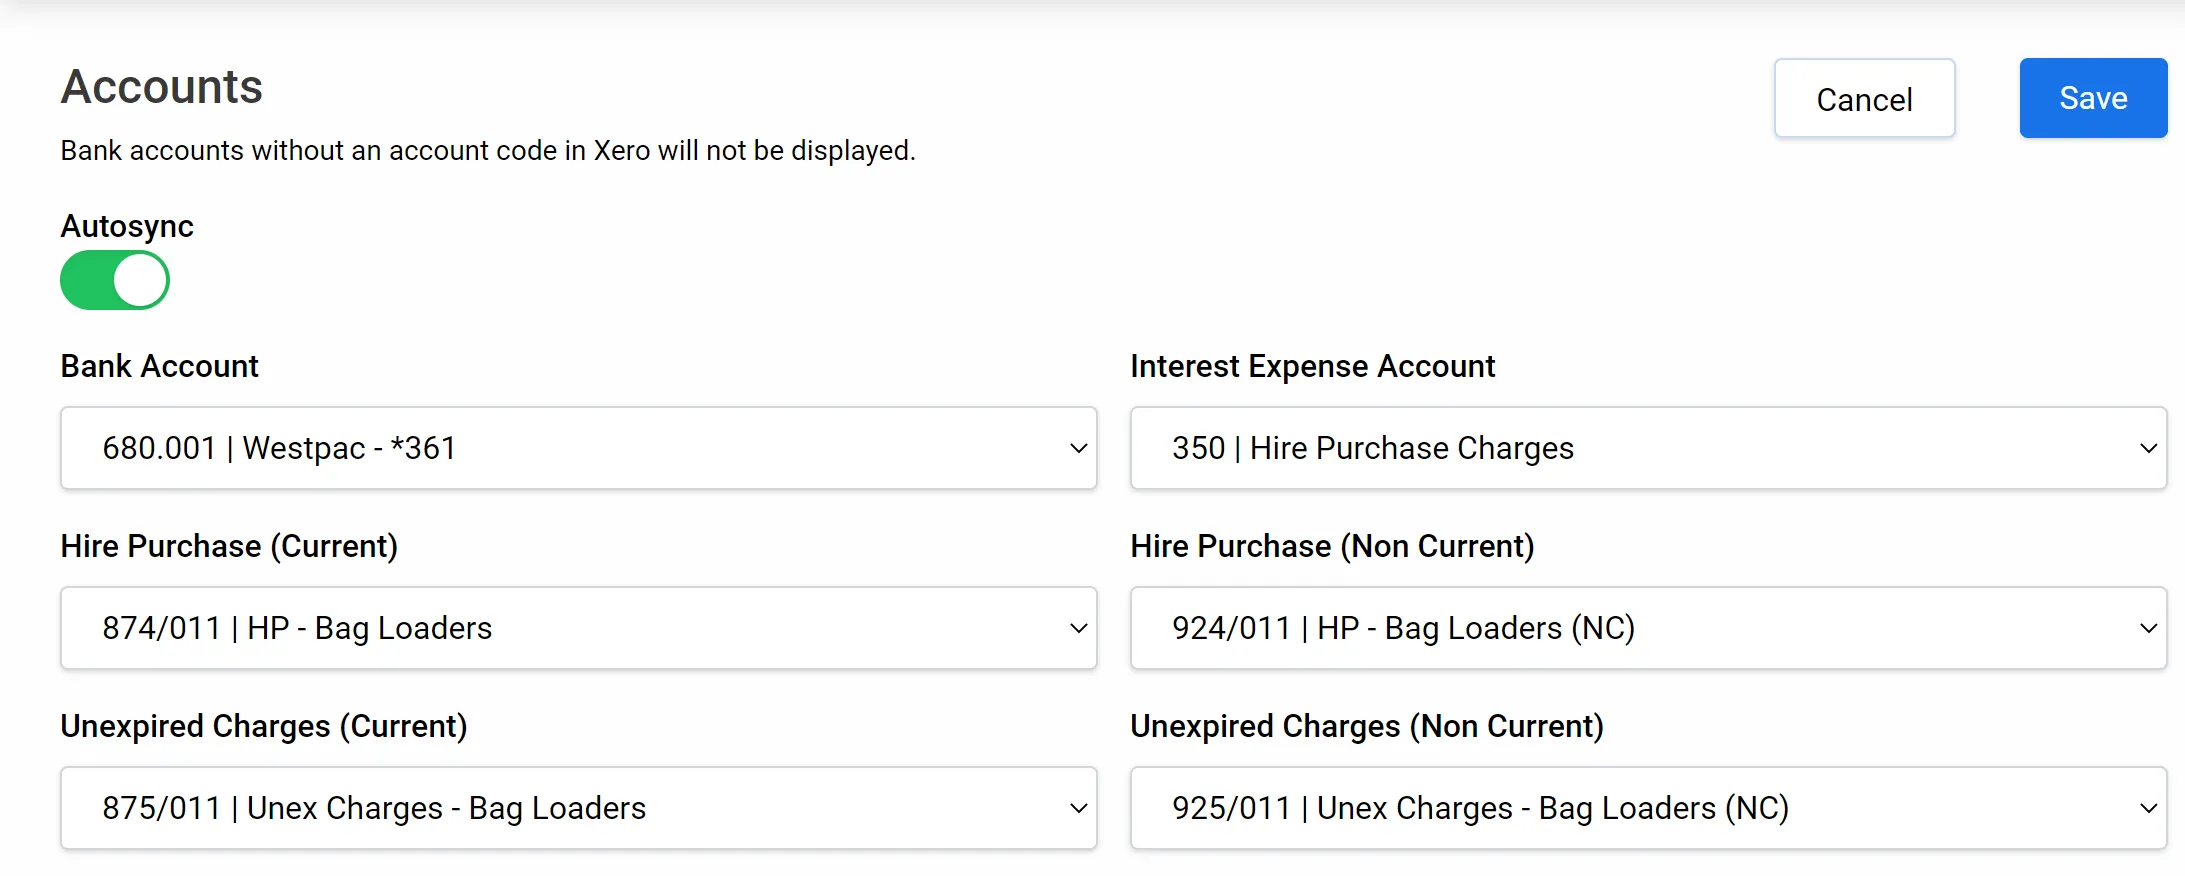
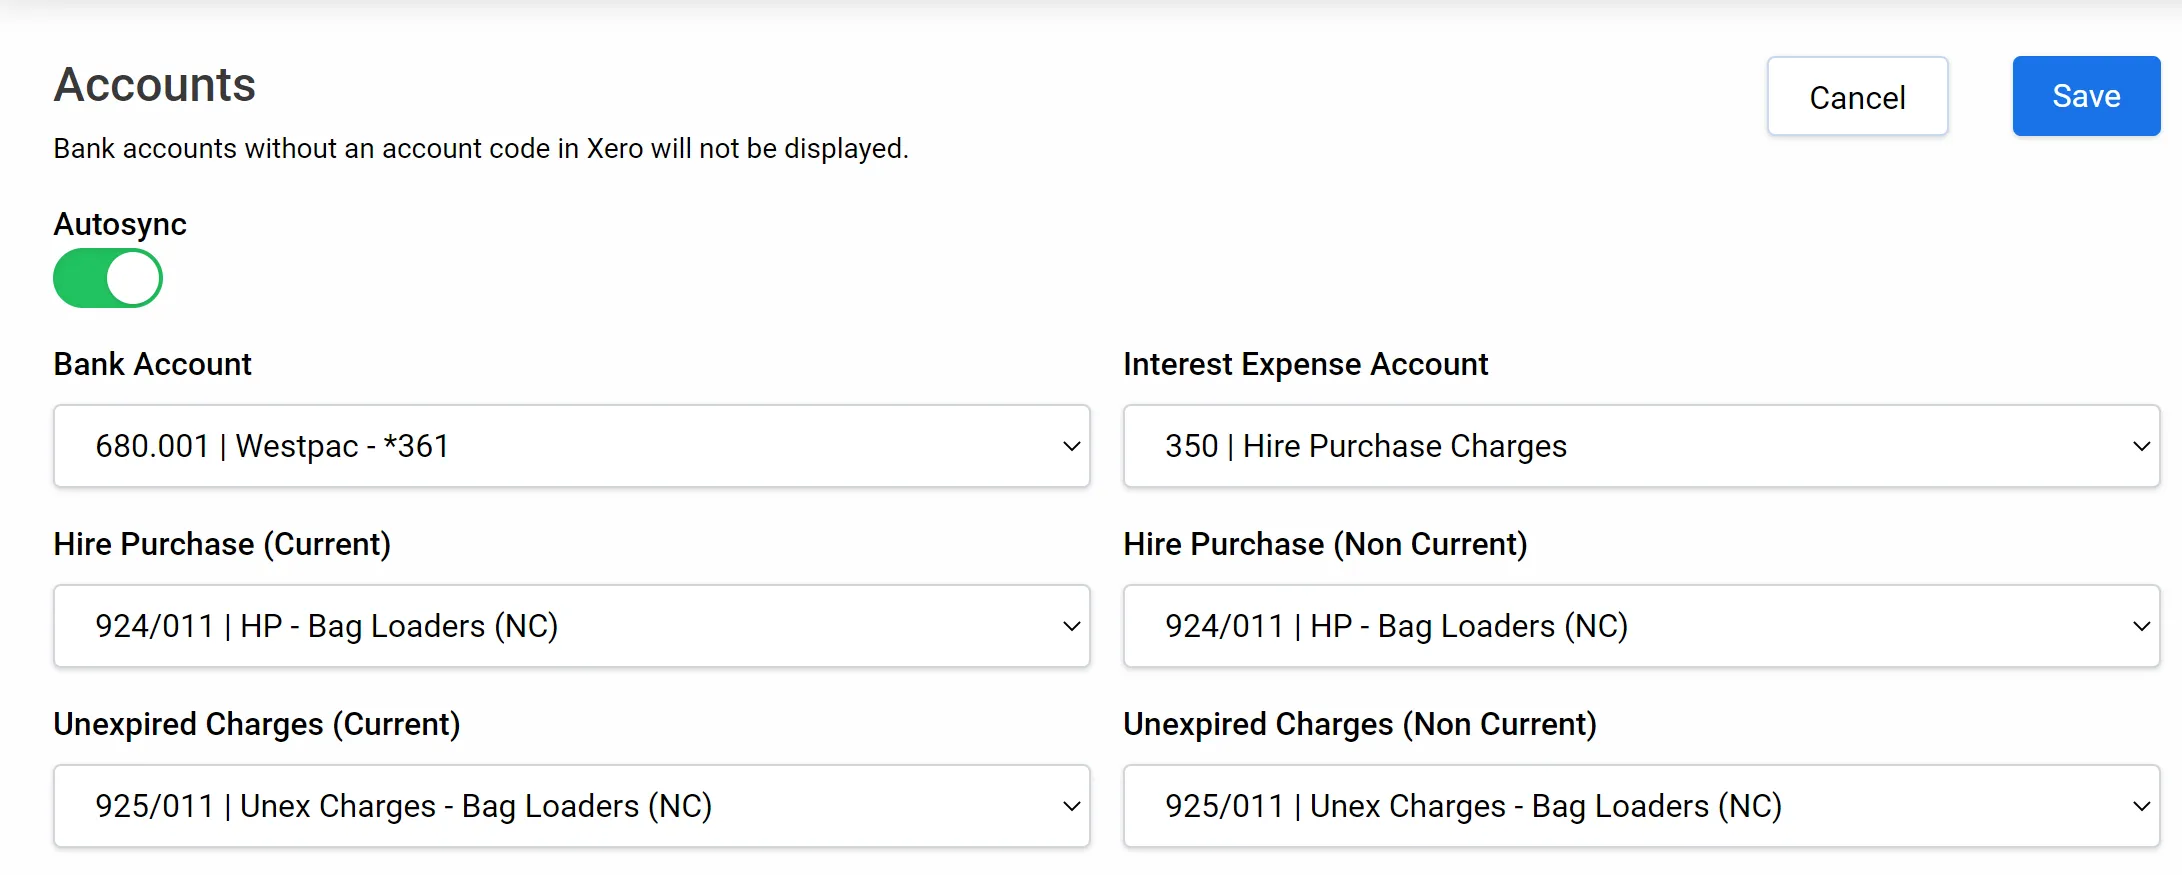
The accounts screen will have the following options:
- Bank Account = The bank account from within Xero where the payment is taken out of.
- Interest Expense Account = The interest portion of each payment will be allocated to this expense account.
- Hire Purchase (Current) = current liability account (payments to be made in the next 12 months)
- Hire Purchase (Non-Current) = non-current liability account (payments that will occur in excess of 12 months from now)
- Unexpired Charges (Current) = current liability account (interest which will be incurred in the next 12 months)
- Unexpired Charges (Non-Current) = non-current liability account (interest that will be incurred in excess of 12 months from now)
Example 1 (Where Xero is split between current and non-current)
Example 2 (Where Xero is not split between current and non-current)
-
On this screen you can toggle the Autosync function. Toggling this on will mean that your payments automatically sync to Xero as they occur.
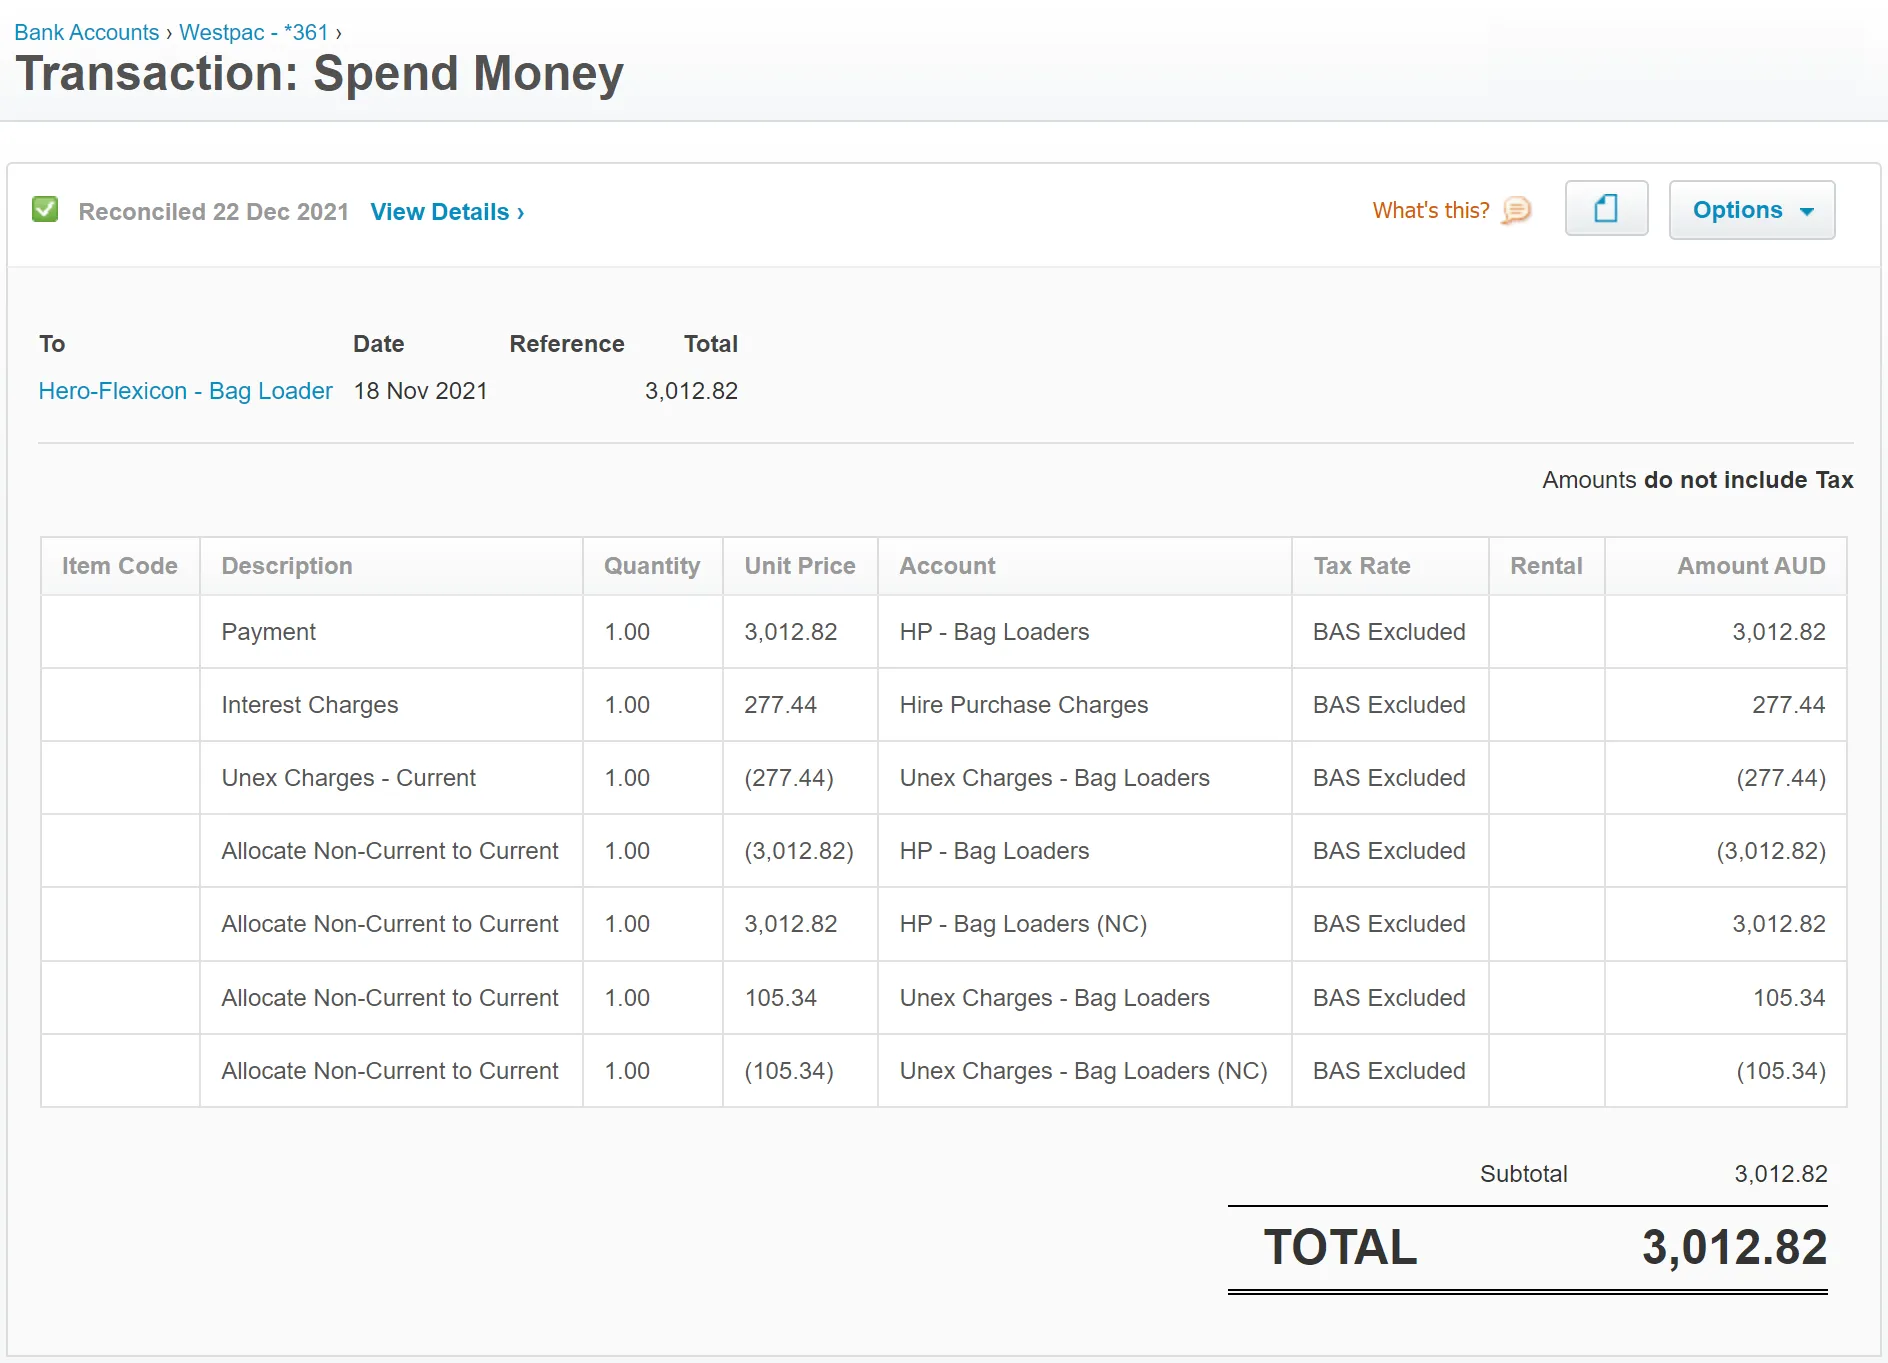
(see example 3 below of a spend money transaction synced by Hero Blue)
Example 3 (Example spend money transaction synced from Hero Blue)
-
Once you are happy with your settings, click the save button.
Data flow diagrams
Section titled “Data flow diagrams”